Common Party Accounting (Link With Supplier)
Customer နှင့် Supplier တစ်ယောက်တည်းဖြစ်နေသည့်အခြေအနေမျိုးတွင် Common Party Accounting ကိုသုံးပါသည်။
Home > Accounting > Accounts Setting
Accounts Setting ထဲကိုဝင်ပါ။
Enable Common Party Accounting တွင်အမှန်ခြစ်ပြီး Save ကိုနှိပ်ပါ။

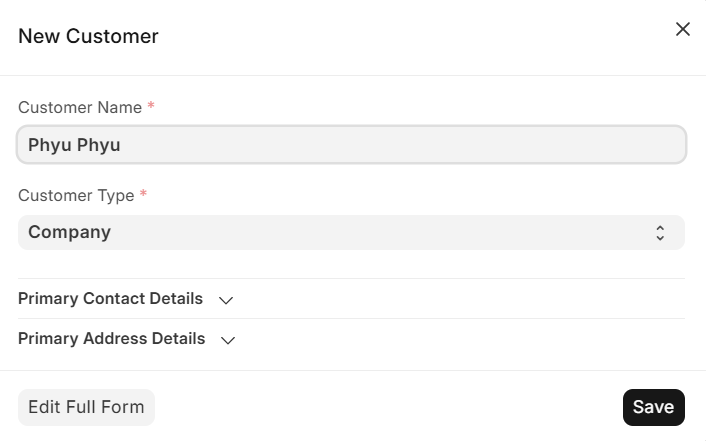
Customer ထည့်သွင်းရန်အတွက် Customer ထဲကိုဝင်ပါ။
Home > Accounting > Customer
- Add Customer ကိုနှိပ်ပါ။

Customer Name တွင် သက်ဆိုင်ရာ Cusotmer Name ကိုထည့်ပါ။
ထို့နောက် Save ကိုနှိပ်ပါ။
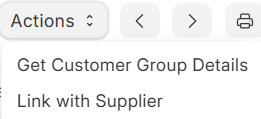
Customer နှင့် Supplier Link ချိတ်မည်ဆိုပါက ထည့်သွင်းလိုက်သည့် Customer ထဲကိုဝင်ပါ။

- Action ကိုနှိပ်၍ Link with Supplier ကိုနှိပ်ရပါမည်။
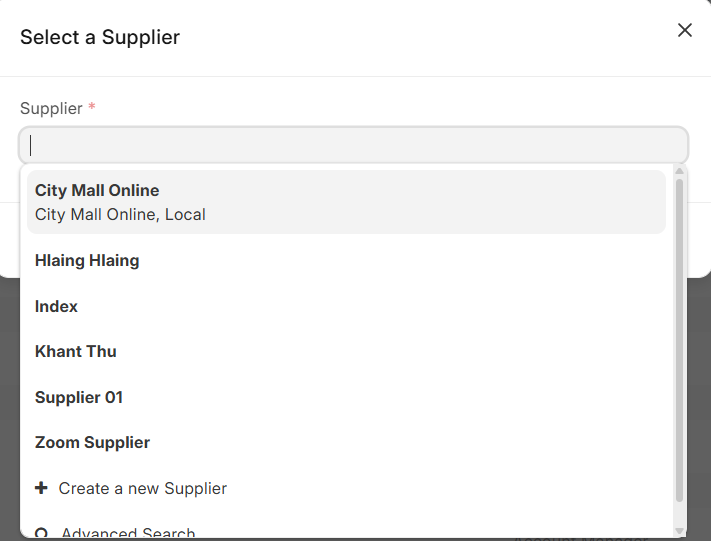
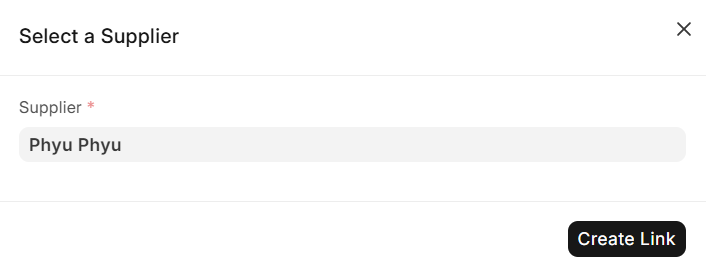
- Select a Suppiler ပေါ်လာပါက Suppiler တွင် Create a New Supplier ကိုနှိပ်ရပါမည်။
Supplier Name ကိုထည့်ပါ။
ထို့နောက် Save ကိုနှိပ်ပါ။
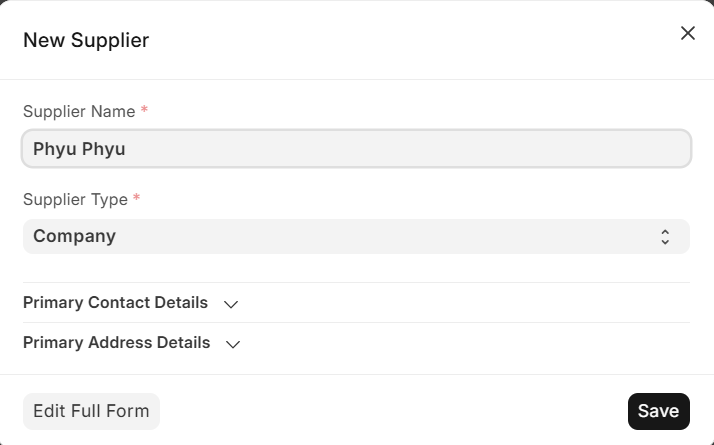
- Create Link ကိုနှိပ်ပါ။
အရောင်းဘောင်ချာထည့်သွင်းရန်အတွက် Sales Invoice ထဲကိုဝင်ပါ။
Home > Accounting > Sale Invoice
- Add Sale Invoice ကိုနှိပ်ပါ။

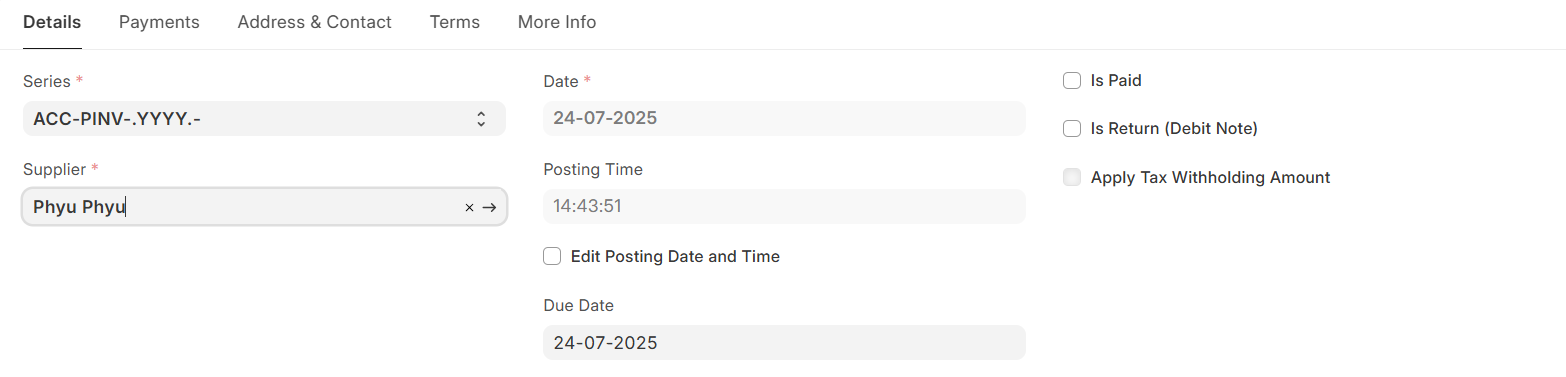
Customer Name ကိုထည့်ပါ။
Edit Posting and Time တွင်အမှန်ခြစ်၍ Invoice ဖွင့်သောနေ့ကိုထည့်ပါ။

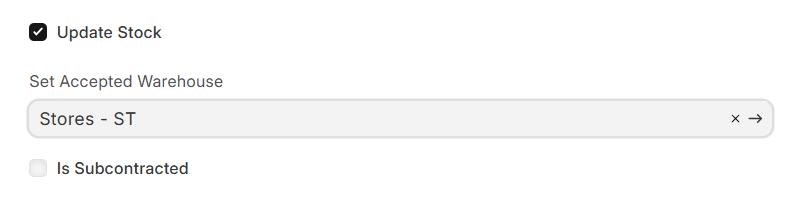
- ပစ္စည်းတစ်ခါတည်း ထွက်ပါက Update Stock ကိုနှိပ်၍ပစ္စည်းထုတ်မည့် Warehouse ကိုရွေးပါ။

Item တွင်ရောင်းမည့်ပစ္စည်းကိုထည့်ပါ။
ထို့နောက် Save>> Submit >> Yes ကိုနှိပ်ပါ။

Accounts Receivable တွင်ကြည့်ပါကလည်းရရန်ရှိပေါ်နေသည်ကိုတွေ့ရမည်ဖြစ်သည်။

အဝယ်ဘောင်ချာထည့်သွင်းရန်အတွက် Purchase Invoice ထဲကိုဝင်ပါ။
Home > Accounting > Accounts Payable > Purchase Invoice
- Add Purchase Invoice ကိုနှိပ်ပါ။

Suppiler ကိုထည့်ပါ။
Edit Posting Date and Time ကိုနှိပ်၍ပစ္စည်းဝယ်သောနေ့ကိုထည့်ပါ။
- ပစ္စည်းပါတစ်ခါတည်း ရောက်ပါက Update Stock ကိုနှိပ်၍ Set Accepted Warehouse တွင်ပစ္စည်းထားမည့် Warehouse ကိုရွေးပါ။
Item တွင်မှာယူမည့်ပစ္စည်းကိုထည့်ပါ။
Accepted Qty တွင် မှာယူသည့်ပစ္စည်း၏ အရေအတွက်ကိုထည့်ပါ။
ထို့နောက် Save>> Submit>> Yes ကိုနှိပ်ပါ။

Journal Entry တွင်ကြည့်ပါကလည်း Double Ledger သုံးထားသည့်အတွက်ကြောင့် Journal Entry Auto ဆင်းသွားသည်ကိုတွေ့ရမည်ဖြစ်သည်။

Account Receivable တွင်ကြည့်ပါကလည်း Sales Invoice အစောင်နှင့် Journal Entry မှချေထားသော အစောင်အားအောက်ပါအတိုင်းတွေ့ရပါမည်။

ထို Sales Invoice အစောင်နှင့် Journal Entry အစောင်အားချေရန် Payment Reconciliation မှပြန်ချေပေးရပါမည်။
Payment Reconciliation ထဲကိုဝင်ပါ။
Party Type နေရာတွင် Customer ကိုရွေးရပါမည်။
Party နေရာတွင် သက်ဆိုင်ရာ Customer ကိုရွေးပါ။

- Get Unreconcilied Entries ကိုနှိပ်ရပါမည်။

- ချေဖို့ကျန်သည့် Sales Invoice အစောင်နှင့် Journal Entry အစောင်အား တွေ့ရပါမည်။

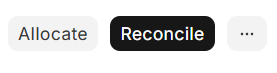
ထိုအစောင်များကို ရွေး၍ Allocate ကိုနှိပ်ရပါမည်။
ထို့နောက် Reconcile ကိုနှိပ်ပါ။
Accounts Receivable Report တွင်ပြန်ကြည့်ပါက ရရန်ရှိစာရင်း လျော့သွားသည်ကို အောက်ပါအတိုင်းတွေ့ရပါမည်။
