Employee ထည့်သွင်းသည့်အချိန်တွင် Attendance Device ID (Biometric/RF tag ID) တစ်ပါတည်းထည့်သွင်းခဲ့ရမည်။ ထည့်သွင်းရန် နောက်ကျခြင်း/ မေ့လျော့ခြင်းများဖြစ်ပါက
- Device ဘက်က Employee Checkin/ Checkout Record များ Software ဘက်သို့ရောက်ရှိလာမည်မဟုတ်ပါ။
Employee ထည့်သွင်းသည့်အချိန်တွင် Default Shift ထည့်ခဲ့ပြီး Device ID မသတ်မှတ်ခဲ့ခြင်း။ (Face Scan or Finger Print Device အသုံးပြုပါက)
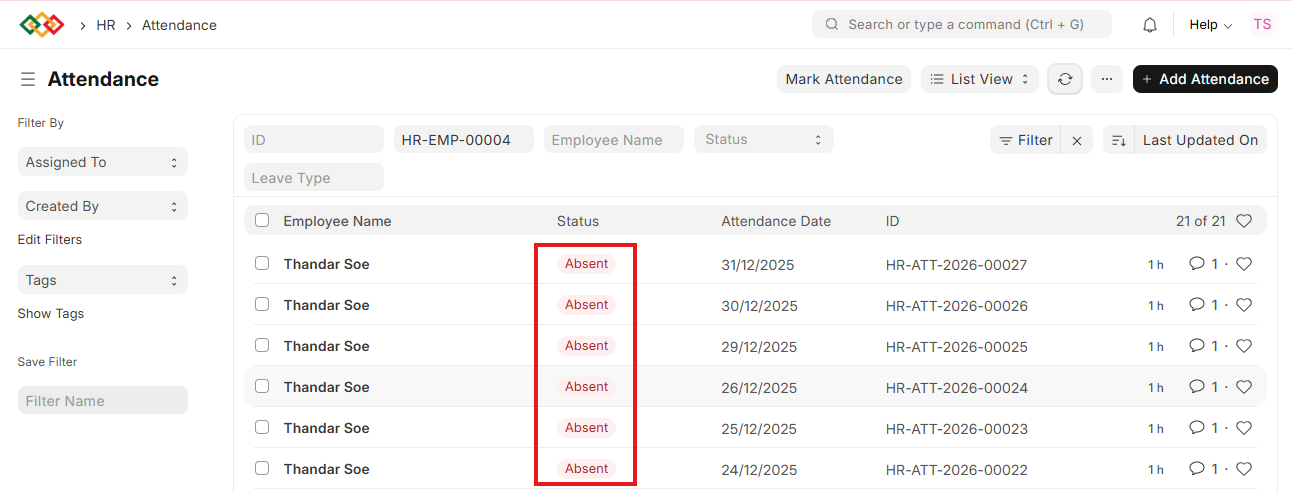
Attendance တွင် Absent နှင့် ပြနေခြင်းအား ပြင်နည်း
- Employee List တွင် အဆိုပါ Employee အား Defaulte Shift တွဲထားခြင်း ရှိ / မရှိ။
- Employee List တွင် အဆိုပါ Employee အား Attendance Device ID တွဲထားခြင်း ရှိ / မရှိအား စစ်ဆေး၍ တွဲပေးရပါမည်။
- Absent နှင့် ပြနေသော Record များအား Cancel လုပ်ပါ။ Delete လုပ်ပါ။
- ထို့နောက် Excel Template ဖြင့် Attendance List ကို Import ပြုလုပ်ရပါမည်။
Employee Checmin Import ပြုလုပ်နည်း
- Attendance List ထဲသို့ဝင်ပါ။
- Absent နှင့်ပြနေပြီး ပြင်လိုသော Record များကို ရွေးပါ။
- Actions မှ Cancel ကိုနှိပ်ပါ။ Yes ကိုနှိပ်ပါ။
- Actions မှ Delete ကိုနှိပ်ပါ။ Yes ကိုနှိပ်ပါ။
Data Import အတွက် Template ပြုလုပ်နည်း
- Data Import List ထဲသို့ဝင်ပါ။
- Add Data Import ကိုနှိပ်ပါ။
- Document Type တွင် Employee Checkin ကိုရွေးပါ။
- Import Type တွင် Insert New Record ကိုရွေးပါ။
- Save ကိုနှိပ်ပါ။
- Download Template ကိုနှိပ်ပါ။
- File Type တွင် Excel ကိုရွေးပါ။
- လိုအပ်သော Check Box များကို အမှန်ခြစ်ပါ။
- ID
- Employee
- Employee Name
- Shift Type
- Time
- Location / Device ID
- Export ကိုနှိပ်ပါ။
- Excel File ကိုဖွင့်ပါ။
- Enable Editing ကိုနှိပ်ပါ။
- Excel File ထဲရှိ အချက်အလက်များတွင် Shift Stat နှင့် Shift End တို့တွင် ရက်စွဲနှင့် အချိန်ကိုပြင်ပါ။
- Excel File ကို Save ပြုလုပ်ပါ။
Data Import ပြုလုပ်နည်း
- Attach ကိုနှိပ်ပါ။
- My Drive ကိုနှိပ်ပါ။
- Excel File ကိုရွေးပါ။
- Open ကိုနှိပ်ပါ။
- Upload ကိုနှိပ်ပါ။
- Start Import ကိုနှိပ်ပါ။
- Success နှင့် ပြပါမည်။
- Attendance List တွင် စစ်နိုင်ပါသည်။
• Shift Type တွင် သတ်မှတ်ထားသော Information မှားယွင်းပါက Attendance တွင်လည်းမှားယွင်းနိုင်သည်။
o Shift Type တွင် Information များပြင်ဆင်ပါ။
o Attendance တွင် ပြန်လည်ပြင်ဆင်လိုသည့် Attendance စာရင်းများကို Cancel လုပ်ပါ။
o Employee Checkin တွင် Skip Auto Attendance မဝင်နေရန် Filter ရွေး၍ စစ်ဆေးပါ။
Date Range >>> Between >>> ?
o Filter လုပ်ထားသော Record များအား Select All လုပ်၍ Action ဖြင့် Skip Auto Attendance >>> Value (Off) လုပ်ပါ။
o Shift Type တွင် Mark Attendance ကိုနှိပ်ပါ။
o Attendance များပြန်လည်မှန်ကန်သွားသည်ကိုတွေ့ရမည်။